Storybook 是什么
使用 Storybook 可以为你的项目一键生成样式指南(Style Guide)页面。
使用 组件驱动开发(CDD) 的模式,首先完成基础组件,通过组件复用的方式构建功能模块和页面。
使用 CDD 开发有如下好处:
- 开发和设计更方便交流,更快速的迭代产品原型。
- UI 与业务分离,基础组件间无依赖,可以并行开发。
- 组件拆分更合理、规范,整体风格由基础组件决定,可以保证 UI 风格的统一性。
- 组件包含文档和样例,方便其他开发人员使用。
Storybook 是一种 CDD 的实现方案,支持多种 UI 框架,一键生成在线样式指南。包含组件文档、组件预览、在线调试等功能。
Storybook 优点
- 环境配置简单快捷,一条命令即可完成配置 (CRA 基础上)。
- 样式指南编写简单,可自动提取 Props 定义、组件名称等,无需繁琐步骤即可使用。
- 提供插件机制,功能可扩展,默认支持响应式设计,预览背景,实时属性更改,自动化文档等。
- 支持 MDX 格式,可编写带组件预览的 Markdown 文档,亦可作为纯文档使用。
- 可以独立打包成 App,作为 UI 文档发布。
安装
在项目中运行
1 | npx sb init |
会在项目中生成如下文件
1 | .storybook |
除此之外,还会自动修改package.json,添加相关依赖和 scripts
1 | { |
运行yarn storybook即可直接预览 Demo
编写 Stories
概述
Story 文件以.stories.tsx结尾,如存在自定义文档,则以.stories.mdx结尾。
每个 story 文件为一个菜单项,通过 ESModule 的形式导出。
default 导出为页面配置 (组件、标题等)
export 导出为组件的每种 Props 枚举的样式,可添加多种展示方式。
1 | import React from 'react'; |
组件预览页面
首先配置组件默认导出,必填项为title
1 | export default { |
- title: 用于组织菜单层次结构,可以通过
/创建子目录(如:Example/Component/Button) - component: Story 相关的组件(用于自动生成文档等)
导出每个组件有两种方式
可直接导出组件
1
export const Primary = () => <Button primary label="Button" />;
直接导出组件不包含控制选项,仅提供样式预览
使用 Args 方式导出(推荐)
1
2
3
4
5
6
7const Template: Story<ButtonProps> = (args) => <Button {...args} />;
export const Primary = Template.bind({});
Primary.args = {
primary: true,
label: 'Button',
};使用 Args 导出模式可自动添加 Props 相关控制选项,并且重用 Props 很方便
1
2
3
4
5const Secondary = ButtonStory.bind({});
Secondary.args = {
...Primary.args,
primary: false,
};
自定义组件文档
Storybook 支持自行编写组件相关文档,文件后缀名为.stories.mdx
MDX = Markdown + JSX
首先需要先定义菜单名称和相关组件(类似.stories.tsx的默认导出)
1 | import { Meta, Canvas, Story } from '@storybook/addon-docs/blocks'; |
接下来可以使用 Markdown 语法和 Canvas、Story 等 JSX 标记编写文档
1 | export const Template = (args) => <Button {...args} />; |
Story:组件展示Canvas:包含代码片段的展示块
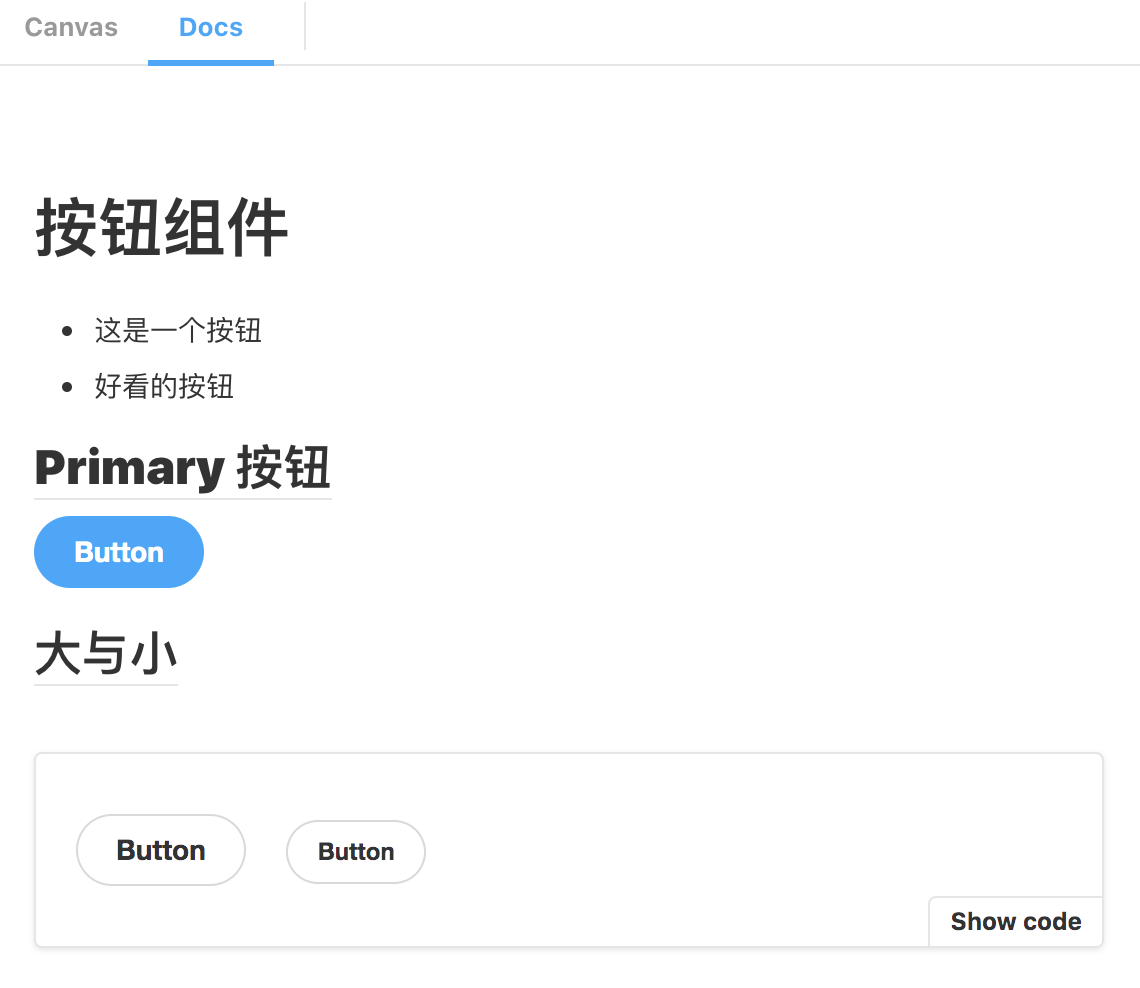
此段代码生成如下效果

注: 每个 Story 块生成一个子项,多个子项共用一个文档
组件注释方法
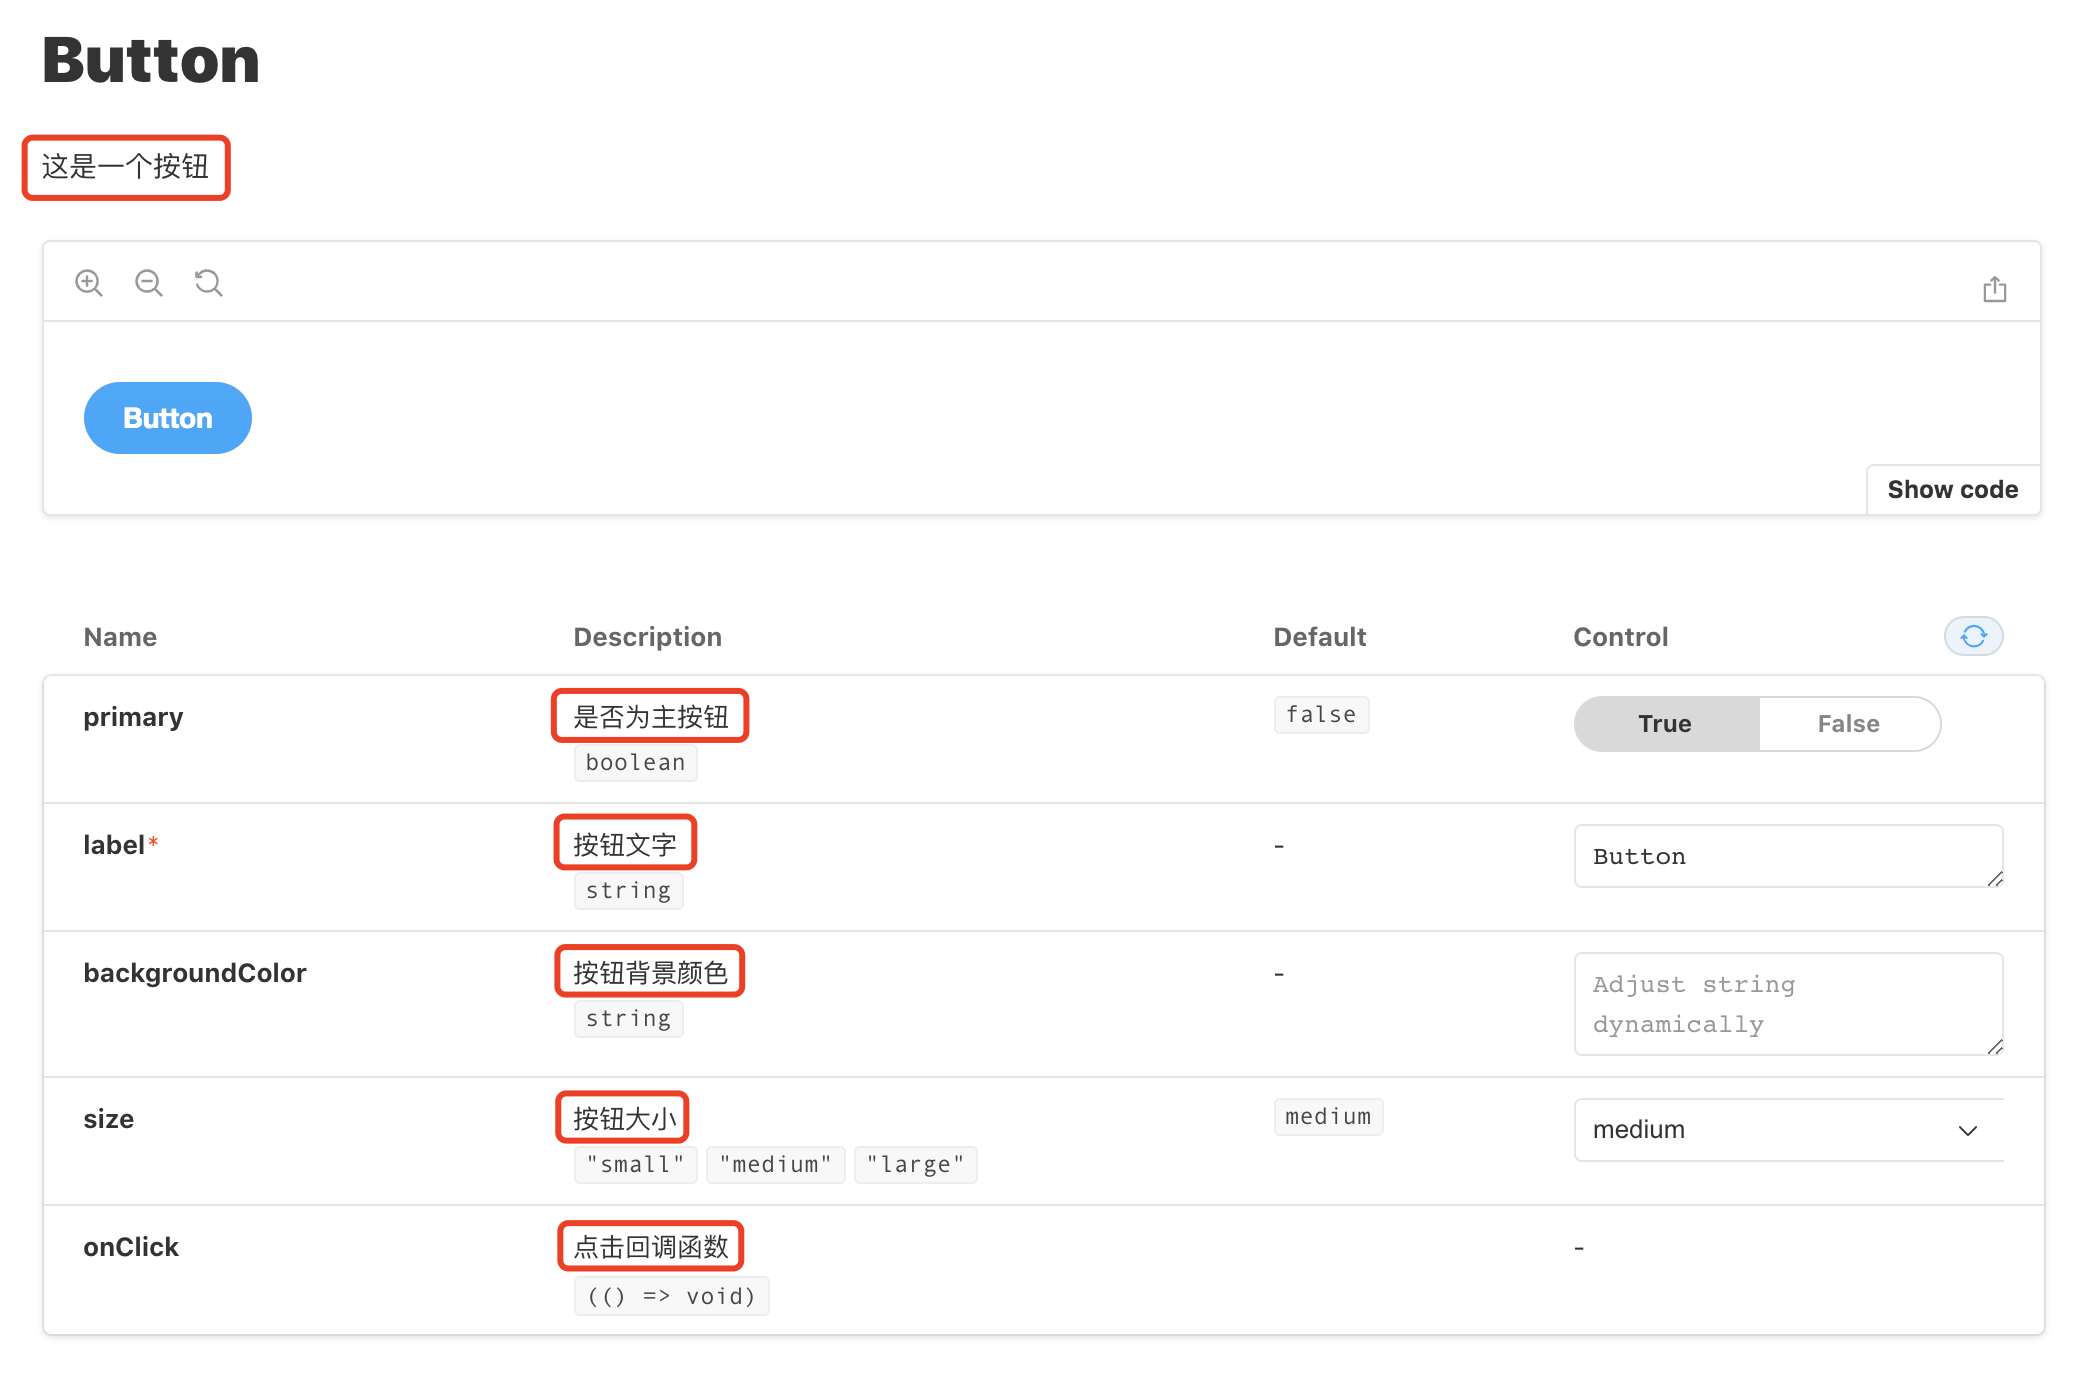
组件 Props 注释(用于生成文档的 Props 描述文字)
组件行首注释(用于生成文档的组件描述文字)
1 | import React from 'react'; |
此段代码生成如下效果(注意红框内的文字)
常用配置
Storybook 配置可分别指定作用范围,分为组件配置、Story 文件配置、全局配置,继承关系如下:
全局配置
.storybook/preview.js1
2
3
4
5
6
7
8
9
10
11
12
13
14
15export const parameters = {
backgrounds: {
default: 'twitter',
values: [
{
name: 'twitter',
value: '#00aced',
},
{
name: 'facebook',
value: '#3b5998',
},
],
},
};Story 文件配置
Button.stories.js1
2
3
4
5
6
7
8
9
10
11
12export default {
title: 'Button',
parameters: {
backgrounds: {
default: 'twitter',
values: [
{ name: 'twitter', value: '#00aced' },
{ name: 'facebook', value: '#3b5998' },
],
},
},
};组件配置
Button.stories.js1
2
3
4export const Large = Template.bind({});
Large.parameters = {
backgrounds: { default: 'facebook' },
};
装饰器
使用装饰器可以在组件渲染时,包裹固定的上下文或样式。
全局配置
1
2
3
4
5
6
7
8
9import { ThemeProvider } from 'styled-components';
export const decorators = [
(Story) => (
<ThemeProvider theme="default">
<Story />
</ThemeProvider>
),
];Story 文件配置
1
2
3
4
5
6
7
8
9
10
11export default {
title: 'Button',
component: Button,
decorators: [
(Story) => (
<div style={{ padding: '3em' }}>
<Story />
</div>
),
],
};组件配置
1
2
export const Primary = …
Primary.decorators = [(Story) => <div style={{ padding: '3em' }}><Story/></div>]
自定义 Controls 类型
在 Controls 面板中,Storybook 会自动通过 Props 的类型选择合适的控件,也可以手动指定需要的控件。
.stories.tsx
1 | export default { |
argTypes属性可以指定某个 Props 使用指定的控件。可用的 Control 属性如下:
| Data Type | Control Type | Description | Options |
|---|---|---|---|
| array | array | serialize array into a comma-separated string inside a textbox | separator |
| boolean | boolean | checkbox input | - |
| number | number | a numeric text box input | min, max, step |
| range | a range slider input | min, max, step | |
| object | object | json editor text input | - |
| enum | radio | radio buttons input | options |
| inline-radio | inline radio buttons input | options | |
| check | multi-select checkbox input | options | |
| inline-check | multi-select inline checkbox input | options | |
| select | select dropdown input | options | |
| multi-select | multi-select dropdown input | options | |
| string | text | simple text input | - |
| color | color picker input that assumes strings are color values | - | |
| date | date picker input | - |
自定义 Props 描述
Story 可以覆盖默认的 Props 描述(来自静态代码分析)
还可以添加大段文字,以说明 Props 的用途
1 | export default { |
插件系统
官方插件列表:https://github.com/storybookjs/storybook/tree/master/addons
添加插件的一般步骤
- 使用 yarn 或 npm 安装相关依赖
- 修改
.storybook/main.js中的addons字段,添加插件 - 在
.storybook/preview.js中添加相关配置(可选)
快照测试
- 安装插件:
yarn add --dev @storybook/addon-storyshots react-test-renderer 在
src/stories中新建文件snapshoot.test.ts1
2
3import initStoryshots from '@storybook/addon-storyshots';
initStoryshots();运行
yarn test即可在src/stories中生成__snapshots__文件夹,包含 stories 中组件的快照